I do it because it's expensive to have as many reloadable cans as I would need!
Polypan cans usually yield between 40 and 60 rolls of 36 exposures per 90M can.
I'm now going to start rolling 24 exposure rolls, so imagine how many that'll need!
So, lets say you want to develop a roll of film, but want to save the can for reuse. Most of you out there in the changing bag/tent or darkroom take your 35mm can opener and just rip the top off!
I know, I've done it..
Well, that was until I started doing it this way. Now I never rip off the top, and if I ever accidentally lose the leader and can't retrieve it by licking another leader and feeding it in, well, I use this method.
So get yourself your roll of film and your favorite 35mm can opener.
I would suggest practicing this in the light first before doing it in the dark. Might mean you have to sacrifice a roll though!
So I have a roll of Kodak 400 film, and my old Sears 35mm can opener. This poor old can opener has certainly been through a lot. It looks as beaten up as my old Signet 35!
Since we have the film and the opener, lets get started..
Gently work our way around the can, lifting little by little. Don't rush it! This takes time, and if you rush it you'll ruin all your hard work!
We're trying to save the can, not ruin it.
Anyway, as you can see I have a very small space now between the lid and the can. Slowly work that space all the way around the can, and the lid will lift away.
Here's the cap off the canister, and you can see a small piece of felt attached. This is a good thing, as it will let you know the direction it came off. Not 100% necessary, but good to know and have, just in case.
Top is off, and the film spool is out.
As you can see this one is already shot and cut off from the spindle. Make sure you load it back into the can the same way you took it out. If you flip it over all you do is backwind it, and that'll cause other problems.
Put the spindle in and pull the film tight out of the light trap. This flap of film is where you'll be attaching your new film to.
As you can see the spindle is in, and the edges aren't bent or kinked at all. Now to reassemble the film canister. This is actually a really easy process, just be gentle with the edges is all.
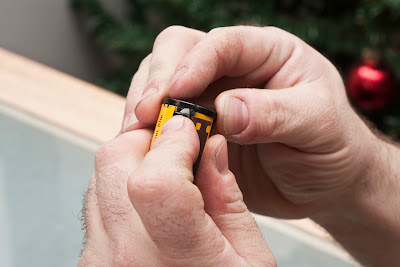
Pinch the sides closed so you can form a rough circle. This is so you can attach the top of the canister easily.
While pinching the sides with your thumb and fingers, align the top and start adding pressure and work it around the edges of the film can. Inspect it as you go along that all the edges are in the slot properly and not over the lip of the top. This will actually bend the lid's lip or the film can and render the can almost useless unless you have some beading pliers and can fix it.
Inspect the edges carefully. I'm checking here to make sure that the film can is in the top properly and ready for the final press.
Using your thumbs on the side where the spindle protrudes, and on either side of it, press the can firmly in between your hands, as I have done here.
You should feel it snap shut, and even possibly hear it!
This part can actually be substituted with a door and jamb. But placing the can in the door jamb with the spindle top facing out of the door, and the bottom facing toward the door, bring the door against the film can and make sure that the door is going to close FIRMLY and SQUARELY on the can.
Swing the door open slightly then firmly bring the door shut against the can. This will force the lid down onto the can and snug it up.
This can be repeated a couple times if desired, and you can rotate the can to make sure it's even all the way around.
After pressing it tightly shut, inspect the edges of the film can to make sure that the can is properly in the seat of the lid.
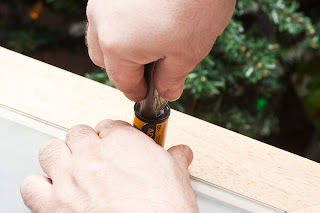
Using the 35mm can opener, you can press down on spindle side with the lid against the table This part is unnecessary if you have opted for the door method. It's my personal favorite method really.
The other option is you can use a butter knife with a good weighted handle, and putting the film can against the table edge with the spindle facing the floor, give the lid of the can a couple good solid 'hits' with the flat edge of the handle. This will also seat the lid properly.
Make sure you rotate the can to make sure it is even. I have done this method a few times, but much prefer the door method!
There you go, the can is assembled, the film is out and ready for film to be attached, and the job is complete!
Hope this method works as well for you as it does for me!
*NOTE : Fujifilm Cans are a bit of a pain to reassemble. I have found that the door method works best with Fuji cans. Kodak are some of the easiest to work with, but there are some Chinese film cans that are snap ready cans, and easily open and close with just a bit of pressure from your hands, and snap closed!
Those are the best cans, and whenever I have sent film anywhere, it is never in those cans!
Until next time fellow bloggers, keep those shutters firing!


No comments:
Post a Comment